Yosemite, the new Mac OS that replaced Mavericks this year, was released to much fanfare. And for the most part it has been a very solid operating system. You can install this OS for free from Apple’s AppStore (for anyone running Snow Leopard or later), so what’s not to love?
For me, I was very excited about Yosemite, and even wrote a blog post about its release. However, after a few months, I have decided not to install Yosemite for a few reasons (and by the way, these reasons should be taken into consideration, even if you have a Windows PC and are thinking about upgrading your OS).
- The biggest reason for me is the functionality of applications. Many applications I use have not been written to work for Yosemite at the moment — and if you have critical applications, you should NOT go to a new OS until you have tested all of your applications.
- Bugs. Every OS starts off with a few bugs, and while they quickly figure out the kinks, I am not interested in going through the motions until these are worked out. I would prefer to give the OS a few months to let others work through those until I am on-board.
There are a few other reasons, such as you own an old Mac that might not be able to handle Yosemite, or you don’t know your Apple ID username or password, but the two reasons above are the biggest reasons I have chosen not to move to Yosemite… yet.
I suppose a third reason could be that I am lazy. Because there are options, so I could move forward…, but I have yet to act on them.
When you decide to move to a new OS, you MUST make a backup of your machine. There are many instances where the OS installation will go bad, leaving you with a corrupt OS. If you don’t have a backup of your system, you are stuck. I also ensure I have a backup to which I can restore my old OS, in case something goes wrong (such as Yosemite not being able to open my apps).
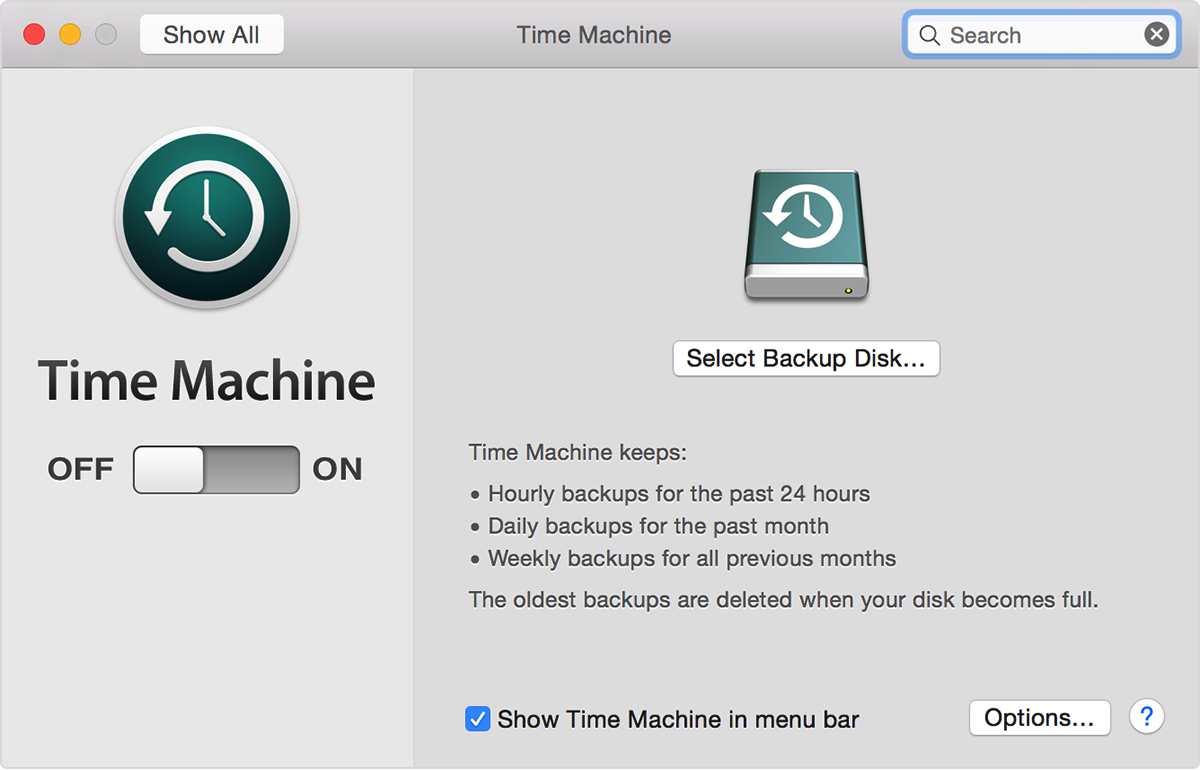
You actually have a built in tool for handling backups, called Time Machine. Taking a backup with Time Machine is easy. Launch Time Machine from Spotlight in the upper right hand corner, and point to the backup disk you would like to take the backup to. I do this manually and connect an external drive to my Mac in order to take a proper backup.
 Once you have a successful backup, you can actually restore your OS, using that backup. To do that, you need to boot into the OS X Recovery system. When booting your Mac, hold down command+R until the Apple logo appears.
One of the options should be ‘Restore from Time Machine Backup.‘ You can then choose that, and the location of the backup you just took, and restore your system. It is as simple as that.
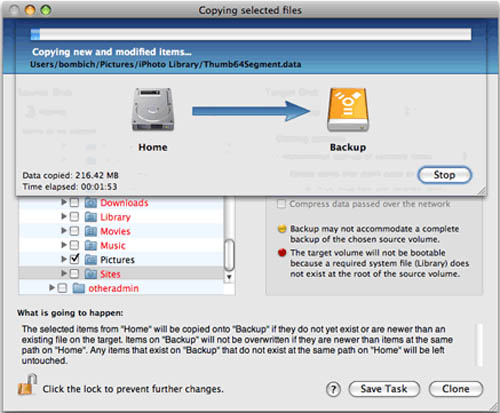
Doing this should give you the peace of mind that if you need to go back to Mavericks, you have the ability to do so. You also have some other options out there for creating backups and restores, and I discussed one of these options in another blog recently as well. Carbon Copy Cloner gives you a great user interface and easy-to-use tools for doing the exact same thing as Apple’s Time Machine.
With options such as these, you don’t have an excuse not to try out Yosemite (unless you are lazy, like me). ![]() I will get around to it eventually, and when I do, I promise to write a full review! In the meantime, remember: if you need help either backing up or restoring your systems for your business, we are always here for you, 24/7, at Everon: 888-244-1748.
I will get around to it eventually, and when I do, I promise to write a full review! In the meantime, remember: if you need help either backing up or restoring your systems for your business, we are always here for you, 24/7, at Everon: 888-244-1748.