Tech Tips for Techs: Public folders in an Office 365 hybrid environment

Standard


Crash blog - Jan 2014 In this TechTip, I want to address an interesting quirk we discovered in a client’s O365 hybrid implementation back in September. During the process of migrating all of the mailboxes to the cloud, the decision was made to leave the Public Folders on their on-premises Exchange 2010 server. While the migration was going, we discovered that there was a small subset of those migrated mailboxes that couldn’t access or expand the public folder structure. When attempted, they were presented with the following error in Outlook:

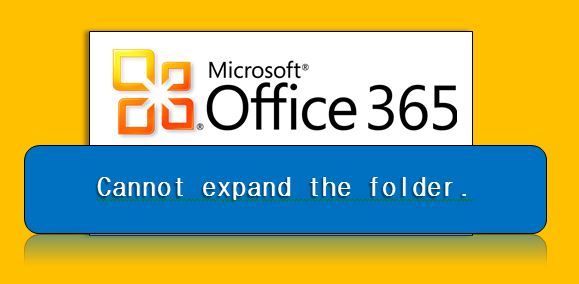
Cannot expand the folder. Microsoft Exchange is not available. Either there are network problems or the Exchange server is down for maintenance.

I was able to recreate this same issue on my computer for an account that works fine, as well as for the non-working user. After an exorbitant amount of netsh tracing, Outlook logging, permission verification on the 365 and on-prem sides of the wire, we discovered that there’s an account attribute that get used in the authentication process back to the on-prem Exchange box. It’s called LinkedMasterAccount.

Evidently in a hybrid environment, if this attribute is populated, authentication against an on-prem Exchange server’s public folders will fail with that vague error message I mentioned above. The solution here is a fairly quick and easy one - clear the attribute from the AD account.

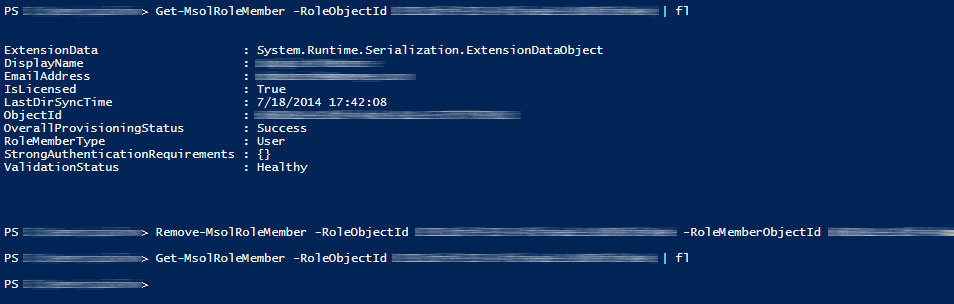
In the on-prem Exchange server, fire up the Exchange Management Shell, and run the following Powershell command: Set-User -Identity [email protected] -LinkedMasterAccount $null Once that’s been run, force a FULL DirSync to run, close Outlook, and try again.

And remember, you can always contact us at [email protected], or reach us at 888-244-1748, for help. We’re available 24/7!

Tech Tips for Techs: Applying Office 365 licenses in bulk using Powershell

Standard


In this TechTip, I want to cover an issue that’s come up several times in the last few weeks for some of our larger customers. When you’re dealing with a user base in the thousands, user and license management in Office 365 can become quite a tedious task, if you’re using the GUI. Impractical, in fact. So we use Powershell to help us with these requests. Below, I’ll show you a couple of scenarios that I’ve run across and what I’ve done to solve them.

Scenario 1: A company just purchased Office 365 services - 4800 seats of E3. Their IT department has just created all 4800 users in 365, but now needs to assign the purchased licenses to those users.

After you connect to 365 with Powershell, you’ll want to first verify the license types available on your account.

Get-MsolAccountSku

In the context of this scenario, our output should look like this:

14-0922_1

ENTERPRISEPACK is 365-lingo for an E3 license. Confirming that this customer has the correct number (and right type) of license they’ve paid for, we can now proceed with assigning them wholesale to the entire organization. Since we’re dealing with such a large number of accounts, we also need to tell Powershell to give us all the results prior to piping them into the subsequent assignment command.

Get-MsolUser -All | Set-MsolUserLicense -AddLicenses "ENTERPRISEPACK" -Verbose

A caveat here… the SKU ID can vary even with the same license type, depending on whether you have 365 direct with Microsoft or if you’ve purchased it from a reseller. You’ll want to change the wording between the quotes to reflect EXACTLY the output you received from the Get-MsolAccountSku cmdlet.

Assigning 4800 licenses took quite awhile, so I left Powershell to do its business while I grabbed a cup of coffee.


Scenario 2: A company has had Office 365 for a few months and has experienced rapid growth in that time. They find themselves needing more licenses and also wanting to add archiving capability to their current infrastructure.

Using a similar process as in the first scenario, we need to confirm the current environment.

Get-MsolAccountSku

14-0922_2

STANDARDPACK is 365-lingo for an E1 license. We see that they have 600 of them assigned, but have an additional 168 that they’ve purchased. We can also see that they’ve purchased a matching number of Exchange Online Archiving (addon) licenses that they wish to assign as well. As a matter of due course, we’re going to add a few extra parameters to the cmdlet just to make sure that we only assign the Archiving Addon licenses to those users who only have an E1 license.

Get-MsolUser -All | Where-Object {$_.licenses[0].AccountSku.SkuPartNumber -eq "STANDARDPACK" -and $_.IsLicensed -eq $True} | Set-MsolUserLicense -AddLicenses "EXCHANGEARCHIVE_ADDON" -Verbose

This code will parse the existing user list, grabbing only those who are assigned an E1 license, and then will subsequently assign the Exchange Archiving license to those matching that criteria.


Tech tips for techs: Potential fix for errors when setting Global Admin rights in O365

Standard


In this TechTip I want to cover an error that we ran across while helping a customer resolve some strange error messages in Office 365.

The situation: Customer has several hundred users DirSync’ed to Office 365 from on-prem AD. Due to the size of their on-prem implementation, they’ve enlisted the help of another third-party vendor to assist with migrating their email over to the 365 platform. After the user accounts have been created, one of the users wants to be set as a Global Admin - but in the process of doing so they encounter an error that will not allow them to set ANY roles from within MOP.

The error: “You can’t edit the user’s role on this page because they have one or more partner-managed roles…”

The solution: “Partner-managed” roles didn’t make a whole lot of sense. This was something we’d never seen before. Scouring through the Active Users list yielded two accounts that were created by the third-party vendor — one of which was a cloud-only user and designated as a Global Admin. Knowing this was the case, we started combing through the available roles in the ECP, but nothing there was yielding a smoking gun.

Now we turn to Powershell…

The cmdlet Get-MsolRole will list the ObjectID, Name, and Description of all the baked-in roles that are available in 365 to be assigned to users. Your mileage may vary, depending on who you have your 365 offering through and how customized things are, but here’s the list I got back when running it against this tenant:

14-0814_1

It’s a short list, so it didn’t make sense for me to write a ForEach loop to iterate through it. We manually copy-pasted each ObjectID into the Get-MsolRoleMember cmdlet to see if the user in question was a member of any of them. Lo and behold… we found him in the first one!

14-0814_2

As a test, we opted to remove him from the Exchange Service Administrator role. The Remove-MsolRoleMember cmdlet requires you to provide the ObjectID of the user you wish to remove, so make sure that you re-run the Get-MsolRoleMember -RoleObjectID | fl command to grab the ID of the user you’re having a problem with. Once armed with this information, remove the user with the following command:

Remove-MsolRoleMember -RoleObjectID -RoleMemberObjectID

We then confirmed the removal by rerunning the Get-MsolRoleMember cmdlet for that role.

14-0814_3

Once done… we retried assigning that user Global Admin perms in MOP… and it worked!


Summary: The user’s membership in the Exchange Service Administrator MSOL role group was preventing us from assigning him Global Administrator permissions in MOP. By removing him from that group, we were then able to unlock that dropdown and add the permissions as expected.

Happy hunting!


Tech Tips for Techs: Bulk enabling Litigation Hold via Powershell

Standard


In this TechTip, we’ll discuss how to enable, tenant-wide, Litigation Hold via Powershell.

The reason for this post is two-fold: Microsoft doesn’t provide [as of the date that this was written] the ability to bulk-enable Litigation Hold via the MOP GUI. Secondly, there are some oddities that can occur in the 365 backend for people who have their on-prem Active Directory sync’ed with 365 - and this will show you how to get around the roadblocks that those oddities can sometimes present.

First, you’ll need to have Powershell setup and configured to connect to Office 365, as well as the credentials for a Global Administrator user. (Non-licensed is OK.) You will also need to know - in the number of days - how long you want Lit Hold to keep email. For this example I will use 7 years, or 2,555 days. Once you’re connected, run the following Powershell command:


Get-Mailbox | Where {$_.LitigationHoldEnabled -match "False"} | ForEach-Object {
$Identity = $_.SAMAccountName; Set-Mailbox -Identity $Identity -LitigationHoldEnabled $true -LitigationHoldDuration 2555
}

What this will do is parse through every mailbox object, filtering out the ones that already have Lit Hold enabled, and subsequently enabling it for the remainder.

* A key point here : Please note that I’m using the SAMAccountName parameter to identify the mailbox I want to work with. There are a couple of different params that the Set-Mailbox command will accept for Identity - the reason I chose SAMAccountName is because it’s guaranteed to be unique. In a DirSync’ed environment, if a user is “deleted” and then brought back with the same email address, that address can attach itself to multiple GUIDs behind the scenes. This can cause problems if you opt to use PrimarySMTPAddress for the Identity because it will match multiple GUIDs, resulting in the Set-Mailbox cmdlet not knowing which one to enable Lit Hold for. The resulting error in this situation will read: "The operation couldn't be performed because '[email protected]' matches multiple entries." Using SAMAccountName should prevent this problem from happening.

bank vault

Tech Tips for Techs: Converting a Shared Mailbox to a User Mailbox in Office 365

Standard


In this TechTip I’ll cover, in brief, how to convert a Shared Mailbox in Office 365 to a regular User Mailbox. This is, again, one of those things that Microsoft doesn’t provide the functionality for in the portal UI, but does allow you to do through Powershell. Like most Exchange-related tasks that you would leverage through PS, this also does not require a licensed user to run it - only Global Admin rights are required. You absolutely must ensure that you have a free license on your tenant to assign to the newly-created account, or the process will fail. (Cannot create a user mailbox on 365 without a license.)

Once you’re ready, fire up Powershell, connect as a Global Administrator, and run the following command:

Set-Mailbox [email protected] -Type:Regular

 Once this command runs, go back to the Users and Groups section of the 365 portal and initiate a password reset against the newly-created account. Alternately, if you don’t want to go through the temporary password reset process, you can forcibly set the password if you’ve connected to the MSOL service by running this command:

Set-MsolUserPassword -UserPrincipalName [email protected] -NewPassword YourPasswordHere -ForceChangePassword $False

That’s it! As part of the stored proc that runs on the backend, 365 should automatically assign an available license to the new user. NOTE: If you have more than one license type available, make sure that the new account has the license you want it to have. E3, E1, EXO1, etc.

 365 mailbox blog