Tech Tips for Techs: Dealing with errors when creating IRM rules in Office 365

Standard


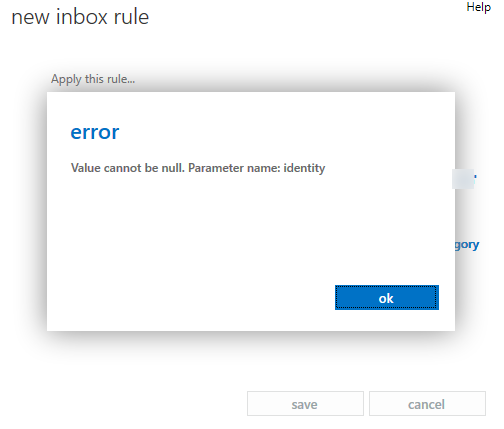
In this TechTip, I want to address a potential fix for an error message we’ve come across when creating a rule in Office 365 that encrypts email messages. Encryption in O365 leverages a Microsoft service called “Information Rights Management,” or IRM. This is supposed to be an enabled/provisioned feature for an Enterprise (read: E3) tenant when it’s created, but as we’re all painfully aware, not all of these automatic provisioning things happen as they’re supposed to. That having been said, if you’re trying to create encryption rules in 365 and run into the following error, chances are that IRM isn’t completely/properly enabled and you’ll have to do it manually through Powershell:

You can't create a rule containing the ApplyOME or RemoveOME action because IRM licensing is disabled.

Should you see this, log into MOP as a global admin, and from Service Settings -> Rights Management -> Manage make sure that Rights Management is active. Once done (and making the assumption that you are in North America), connect to Powershell as a global administrator, and run the following commands:

Set-IRMConfiguration -RMSOnlineKeySharingLocation “https://sp-rms.na.aadrm.com/TenantManagement/ServicePartner.svc”

Import-RMSTrustedPublishingDomain -RMSOnline -name "RMS Online"

Test-IRMConfiguration -RMSOnline

Set-IRMConfiguration -InternalLicensingEnabled $true

The third command (Test-IRMConfiguration) should come back with an overall result of PASS. If it does not, you will not be able to run the fourth. If you hit a FAIL during the test, contact your 365 support folks. We’re advised that this can take up to 24 hours to take effect. I’ve seen it apply as quickly as within a few minutes, but if not, wait the obligatory full day before raising hell. ;)

top secret file

Tech Tips for Techs - “Value cannot be null” error when creating rules in Office 365 OWA

Standard


In this TechTip, I want to discuss briefly an error message I’ve been asked about in Office 365 that led one of my peers on a wild goose chase.

The error, verbatim, reads: "Value cannot be null. Parameter name: identity"

This message pops up when trying to create a rule in OWA whereby you are trying to specify a group as either the sender or the recipient. So, while it would make sense to have a message from “[email protected]” go to an internal Distribution Group of “[email protected],” the mechanism within Exchange Online that processes Transport Rules cannot enumerate the members of a DL and, as such, will not allow you to create a rule that forwards to a distro group. Unfortunately for us mere mortals, the message doesn’t make a whole lot of sense and doesn’t give you a whole lot to go on as to where to look next.

14-0805_1


The only workaround to this is to abide by the restrictions that Microsoft hath lain before us: list all of the destination emails individually.

14-0805_2

For larger groups of people this becomes a huge pain in the posterior. Yes, I’ve complained. No, they won’t do anything about it. Unfortunately, this is all by design, and there are no plans in place (that I’m aware of) to change it anytime soon.


Tech Tips for Techs: Is obvious spam still making it into your Office 365 inbox?

Standard


In this TechTip I want to go over an issue that I’ve seen pop up periodically that might save you a support call to Microsoft.

In the Office 365 platform Microsoft uses a scoring system when it comes to dealing with spam. It’s scaled from -1 to 9 but, interestingly enough, they only use -1, 0, 1, 5, 6, and 9. The other numbers in the scale aren’t used at all by the platform. (Weird, huh?) When a message lands in 365, the content filters will scan the message and apply a score to it based on a combination of variables that include Microsoft’s own spam definitions as well as those set by the system administrator.

These scores are referred to as SCL - Spam Confidence Level. An SCL of -1 gets applied to messages that are explicitly defined as safe, e.g., whitelisted email addresses, IP addresses, or domains. These “bypass” the spam filter. An SCL of 0 or 1 gets applied to messages that the filter has scanned and determined to be safe, and will get dropped into the recipient’s inbox. An SCL of 5 or 6 is given to messages that are ‘quite likely’ to be spam, and those get dropped into the recipient’s junk email folder. An SCL of 9 is given to messages that are ‘most certainly’ spam, and these get dropped into the recipient’s junk email folder as well.

It should be noted that the behavior described above is what the Exchange Online platform does by default. A system administrator can define their own spam/content filtering policies that treat these messages differently, e.g., deleting a message that gets scored with a 9 instead of putting it in the junk email folder. The default content filter policy (which, by the way, cannot be deleted) sits at the lowest priority, allowing a sysadmin to apply a higher priority to their own custom rulesets if so desired.

Now to the meat and potatoes - the issue we’ve seen crop up with some frequency is where a user reports that a lot of [obviously] spam messages are making it through to their inbox. In looking through the message headers, we see that said messages are getting scored with an SCL of 5 or 6, but for some reason they’re not going to junk mail. We check the content filter, and everything looks good there. So why are these messages not going to junk mail?

Simple.

One of the things you should check is to look at the Block/Allow settings in that user’s OWA. From the gear in the top right corner, click Options. From there, click Block or Allow on the left. More than likely, you’re going to see that the “Don’t move email…” option is selected. To enforce the spam filter to do what it’s supposed to do, choose the “Automatically filter…” option, and then click Save.


14-0709_1

14-0709_2


Voila!


Migrating from Exchange to Office 365 - Part 1 - IMAP

Standard

In this Tech Tip series, I’m going to talk about using Office 365′s built-in migration tools to move your mailbox data from on-prem Exchange to the cloud. There are several third-party options available that give you a little more granular control over the process, but the native tools actually work pretty darn good… and they’re free!

This first post will cover the specifics of using one of the four available migration options: IMAP migration. This is not the “best” or fastest option by any means, but if you’re working with an [older] Exchange environment that for some reason doesn’t have RPC or Outlook Anywhere exposed, IMAP is an easy hole to punch in a firewall. (Port 143 if using standard IMAP, port 993 if using IMAP over SSL.) You can verify that 143 is open by testing its public URL or IP with Telnet.

13-1216_1

Alternatively, you can also use the IMAP option with the Exchange Connectivity Tester.

Once you’ve verified that IMAP is exposed and working, log into the Microsoft Online Portal with administrator credentials and open the Exchange Admin Center.

13-1216_2

Once you’re in the EAC, click the Migration link.

13-1216_3

Now click the plus sign (+), and choose the option to Migrate to Exchange Online.

13-1216_4

On the screen that pops up, choose the IMAP migration option and click Next.

13-1216_5

Now - one of the things about IMAP migrations is that the “user pool” is defined by a CSV file. What this means is that any and all of the users that you want 365 to migrate out of your Exchange box have to be defined in a CSV file. It’s simple enough, the CSV file only requires 3 columns (EmailAddress, UserName, Password) and you would populate each row with the data for each user you want to move. This works for a multitude of users or even a single user. Create this file in Excel, save it to your desktop, and then upload it to 365. For example:

13-1216_6

13-1216_7

On the following screen you’ll need to input the information for your Exchange server. (On this particular server that I’m using for this example, it’s not running an internal CA nor was it secured with a third-party cert, so the encryption is set to None.)

13-1231_1

Click Next, give the batch a name, click Next again, and then enter the email address of the person you want to receive the completion report. You must enter an email address here - but it’s important to note you CAN specify an address not inside of the 365 organization. You must also choose whether or not to start the batch automatically or not. Then click New.

13-1231_2


If you chose to start the batch manually, you can then highlight it back on the Migration screen and press the ‘Play’ button. One of the things that I’ve noticed is that these batches don’t always start right away. You may end up waiting a few minutes before you start seeing it move items. Depending on the internet connection of the source Exchange server, as well as its overall condition, health, and size of the mailboxes you’re moving, this process could take minutes, hours, or even days.

How to allow certain file types through Office 365 email

Standard

In this short tech tip, we’re going to talk about how to allow (or whitelist) a specific file type in Exchange Online. Recently I was working with a customer who had an LOB application that exported a daily *.XML file and emailed it out. This business process broke after they migrated to Office 365, and they needed help figuring out why. As of the writing of this blog post, Microsoft does not have a way to globally allow the modification of filetype whitelists from the GUI. That having been said, we have to refer back to an old familiar tool: Powershell.

If you’re just joining us, you will need to ensure that your PC has the minimum version of Powershell installed, along with all of the prerequisite steps taken to connect to Office 365. You can find my previous blog posts on how to do this in their respective order here and here.

Once you’ve connected to Office 365 as a global administrator, you’ll need to run the following command (replacing the .xml with whatever file type you want to OK):


Set-OwaMailboxPolicy OwaMailboxPolicy-Default -AllowedFileTypes @{Add = '.xml'}


That’s it! It’s important to note that you MUST make sure that you have the @{Add = .abc} section in there. You don’t want to replace the existing file type policies with the single filetype you wish to add… you want to add to it. You can also add multiple filetypes in a single command by separating them with a comma, like so: Set-OwaMailboxPolicy OwaMailboxPolicy-Default -AllowedFileTypes @{Add = '.xml','.abc'}


Conversely, you can remove a singular or multiple filetypes from the default mailbox policy the same way with the same command, by replacing the word “Add” with the word “Remove”.

Set-OwaMailboxPolicy OwaMailboxPolicy-Default -AllowedFileTypes @{Remove = '.xml'}