What you can do to improve Outlook performance

Standard


If you’re like me, you are in a constant battle with an ever-growing mailbox that seems to get slower and slower every week. I have used and loved Outlook for a long time. Its stability and ease keep me from moving to its competitors. However, one flaw I have found is that sometimes when I am cleaning up my mailbox, the actual size of the mailbox remains the same. This slows it down. There are a few built-in tools you can use to pep up your mail browsing.

“Compacting” your mailbox removes all the items in your mailbox that you have marked for deletion and lowers the size of your mailbox on your hard drive. Smaller file equals faster access. In Outlook 2010 and 2013 the process is exactly the same.

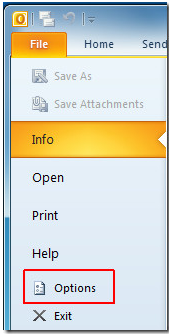
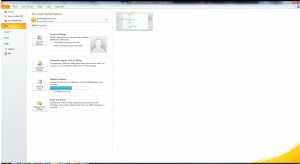
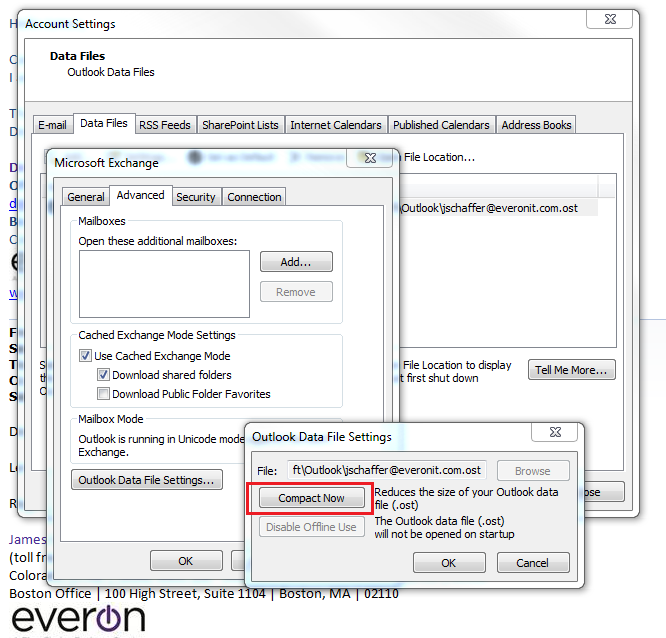
Select the File tab at the top and press Account Settings > Account Settings.

Screenshot 2014-06-26 08.08.31

Select the Data Files tab > Highlight your data file > Select Settings

Screenshot 2014-06-26 08.08.57

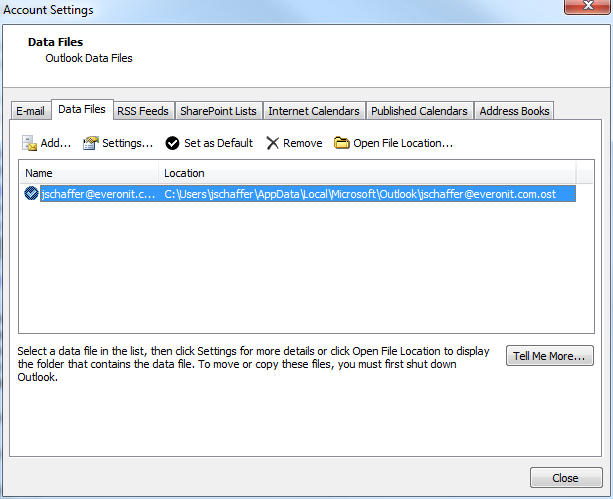
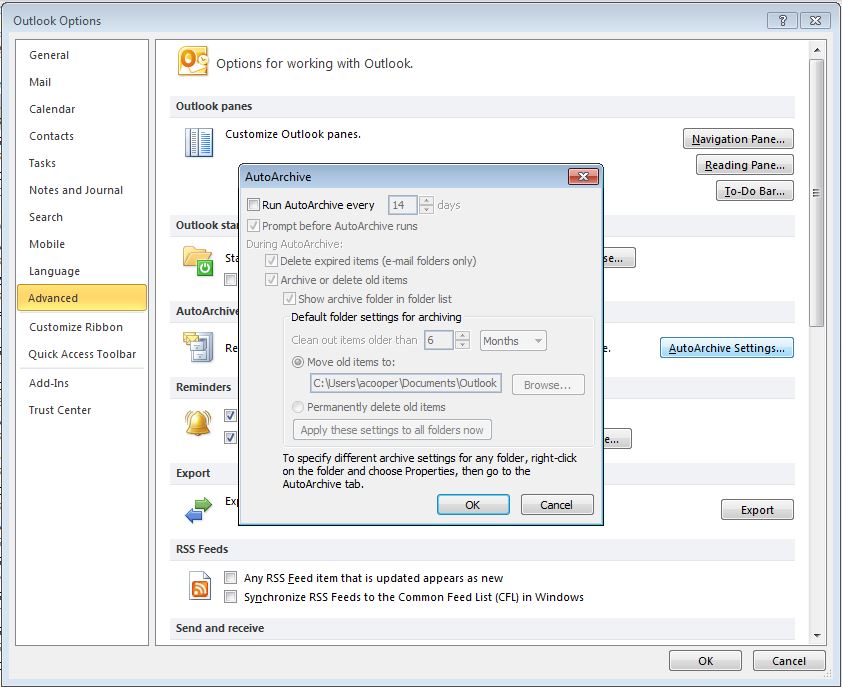
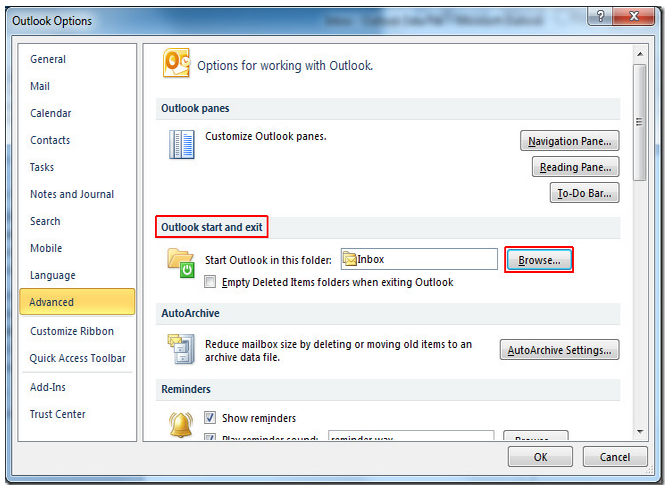
Select Advance and press the Outlook Data File Settings button. Press Compact Now and give it some time (especially if your mailbox is as big as mine!)


Screenshot 2014-06-26 08.10.57


Once that’s done there should be some improvement to your Outlook performance, depending on how unhealthy your mailbox is. If you have multiple mailboxes you should consider doing this process on all of them. Good Luck! And remember: if you need help, you can always call us at Everon (888-244-1748).

Increase free space and hard drive speed by setting up AutoArchiving in Outlook

Standard

Hello again! As we make our way through the hustle and bustle of the new year, realignment of IT infrastructure is usually one of the checklist items within the company. After years of email and daily usage, you may start to find your computer’s “free space” starting to diminish and/or your Outlook client starting to run slow and act “buggy.” Well, today I am here to provide an option for you and your users to clean up and prevent further headaches: AutoArchiving.

AutoArchiving allows you to take older email that you would like to save and move it to another location that is readily available. Most companies utilize an on-premise server for users to save their documents for safe storage and to keep from using up your hard drive space. With Outlook, you have the ability to set up your archive to save your older emails out to your network drive. If by chance you are not utilizing network storage, you can also set up archiving and point it to an external hard drive so that also is saving the data, instead of locally on your machine.

With AutoArchiving you can select certain parameters on when, what items, and how often you want this to run. This is a good practice to implement for many reasons: it helps with free space, helps with the speed of your Outlook, and helps your Outlook and email file from becoming corrupt due to size. Below, I will show you some screen shots on how to set this up and provide details throughout the steps. My example uses Outlook 2010, but the AutoArchive feature is available on all versions of Outlook.

1) Open your Outlook 2010 client.

2) Navigate to FILE>OPTIONS>ADVANCED>Then select “AutoArchive Settings.”

1


3) Once you are in the AutoArchive settings, you need to select the top check box for “Run AutoArchive Every…” and select how often you want it to run. After you select the interval for that, you will need to select the option of at what point you want the items moved. When I set it up, I normally tell it to move out items that are older than 1 month, but this is solely up to you.

2


4) Next, you will want to select the location of where you want your archive stored. This is the place where you can select your network drive or an external hard drive. Simply click “Browse” under the section that says “Move old items to…” and then tell it where you want it saved.

3


4


5) Once you have done all the steps above, that is it. To access these emails after they are archived is very simple as well. You will have a new section in your Outlook that is labeled “Archive” on the left-hand pane, beneath where your current account is listed. For example, in my Outlook, my current account is labeled “[email protected].” Once an archive is setup, mine would show that account, and below all those folders will be one called “Archive.”

5

One additional thing to note is that if you save the archive to a network folder or an external hard drive, those have to be available in order to access the archived mail. So if you are out and about, or at home, you cannot access them without a connection to your work network, such as a VPN client.  If you are using an external drive, you have to have that plugged in to access the mail.

If you have any questions or need help setting this up for yourself, please reach out to Everon at (888)244-1748. We are more than happy to assist.

Start Outlook 2010 With IMAP Inbox Folder

Standard

If you have set up an IMAP account in Outlook 2010, then you must have been looking for a way to change Outlook startup folder to IMAP Inbox. By default Outlook 2010 always open Outlook Data Folder, so you have to navigate to Inbox of specific IMAP account manually. In this post we will focusing on automatically changing the start-up folder of Inbox to IMAP account.

On opening Outlook 2010 you will see the default startup folder which is Outlook Data File inbox

pic one

To make a change, go to file menu and click options.

pic two

From left sidebar select Advanced and from right pane under Outlook start and exit group click Browse.

picture three

You will need to collapse the list so the IMAP accounts are visible. Expand the desired one and click the inbox folder as shown below.

picture four

After clicking the OK button in the Outlook Options window, close Outlook and reopen it to view the changes. You will now view the IMAP account inbox rather than the Outlook Data File.


Outlook 2010 Task Scheduling & Mail Search Add-In

Standard

Both Outlook 2007 and 2010 have been given a powerful add-in called InboxEX. This is geared for those who perform numerous basic and advanced Outlook operations, such as scheduling meetings, searching mails, setting appointments, adding and synching events between Google Calendar and Outlook and sharing calendar events with others on a daily basis.  InboxEX is primarily designed for efficiency to help users manage their office emails and reply in a timely manner.  Outlook 2010 built in search feature requires all mailboxes to be indexed for a thorough search, it may become quite tedious to find important emails.  InboxEX gives an efficient search feature that lets you filter search results for keyword by name, subject, sender or recipients with options to quickly navigate between search result pages.

Meetings and conference calls can be scheduled in minutes without having to import meeting schedule email/conversation template.  Everything is pre-filled with meeting information and schedules.

Before installing InboxEx, make sure that Outlook is not running in the background. Launch Outlook and from the InboxEx pane, add your Gmail account. After you’ve entered the login details, enable Synchronize Calendar with Google and click OK to begin synchronizing your InboxEx data with Google account.

Picture one

Once the add-in is installed you can perform the search functions with the added account folders including meetings and events.

To set up scheduling or meetings just select Schedule a Call with none option, enter the data that is needed and recipient name then click Send.

Picture three

Below is the conference call scheduling option that is under the schedule meeting with none option.  Make sure that the dial in number and pass-code in conference window is accessible from the preferences.

InboxEx is a very handy accent to Outlook for users who manage and work with multiple teams that need to collaborate on group work, as well as share availability and events with others.


Creating a Single Inbox for All Accounts in Outlook 2010

Standard

There is no doubt that Outlook 2010 is great when it comes to managing multiple email accounts, but is lacking in the ability to create a single inbox folder for all your accounts.  Let’s say you want to view all the  emails  you receive from all your different configured accounts including, Yahoo Mail, Gmail, Hotmail, etc… There is not a single folder for receiving or monitoring all those emails.  On the good side, hidden in the Rules ability, there is a feature to set up a single folder enabling the setup of one single folder for all your emails.

Launch Outlook 2010 and from the left sidebar, select an account, right-click it and select New Folder. From the Create New Folder dialog, enter an appropriate name and click OK. For this example, we’ll call it ‘Generic InBox’.

picture one

Next, go to the Home tab and click  Manage Rules & Alerts from the Rules drop-down button.

Picture two

From the Rules and Alerts dialog, select an account and click New Rule.

Picture three

In Rules Wizard, we’ll start off by creating a blank rule. Click Apply Rule on Messages I Receive and hit Next.

Continue to follow the wizard set up, enable through the specified account option.  From the bottom of the dialog window, click Specified Account and select the desired account from the Account dialog window, and click OK.

Picture five

After this step you will see the specified account in the bottom of the dialog window. Just click next to continue.

picture six

In this step, enable Move It to the Specified Folder option then click Specified at the bottom of the window. Select the Generic Inbox folder recently created, from New Rules and Alerts dialog.

Picture sevem

The folder name will be visible at the bottom of the window.  Click finish to exit the wizard.

picture 8

This will bring back the Rules and Alerts dialog, showing the rule you created. Click OK and apply this new rule.

picture nine

For associating this folder with other accounts, repeat the whole procedure to
direct all mails from multiple accounts to the Generic Inbox folder. On
receiving emails, you will see all the emails in the specified mail folder.