Quick Tip: Clear Your Screen with Windows’s Shake Feature

Standard

jelloMy exorbitantly talented coworkers are bursting with knowledge of all-things tech. Last week a co-worker showed me the coolest hack with Windows 7. It was so simple and silly I laughed out loud. It’s a fun way to clear your screen of all other windows, except the one you are working on. Microsoft calls this feature, “Shake.” I call it “the wiggle-jiggle trick.” In any case, the name says it all:

Go to the top bar of the window you want to leave open. Left-click and hold on the bar. Now wiggle, or shake, that window around by jiggling the mouse. All of your other open windows will downsize. (You’re trying it right now, aren’t you? Cool, huh? ;) )

In addition to knowing neato-fun tricks, the Everon team has the most depth of any group of techs I’ve ever met. I’m constantly amazed at how well they function together to keep our wide array of customers happy, and their computers up and running. If you’re not yet an Everon customer, do yourself a favor and give us a call. 888-244-1748. (Or email us at [email protected].) The best trick these guys do is making the headache of your computer systems go away. ;)

——-

You may also like:


Tech Tips for Techs: Windows Animations vs PC Speed

Standard


One of the issues we constantly get calls on is how to speed up the user’s PC to make it run faster. While there are many ideas out there on how to do this properly, I am going to discuss one area that was introduced in Windows Vista, and more-so in 7 and beyond, that bears keeping in mind when trying to speed up a Windows PC.

Windows Animations are something you might miss (especially if you have been using a Vista or greater OS for a while now). They are the little pieces of flair that Microsoft has added to your OS to give it a smoother, less block-y feel.

Click on Windows Explorer. Notice how it briefly expanded to its proper size? Ever notice how certain menus can fade or slide into view? These animations give you the appearance that Windows is smooth, but all of these animations must use up a bit of processing to handle.

Here is where you can turn them all off.

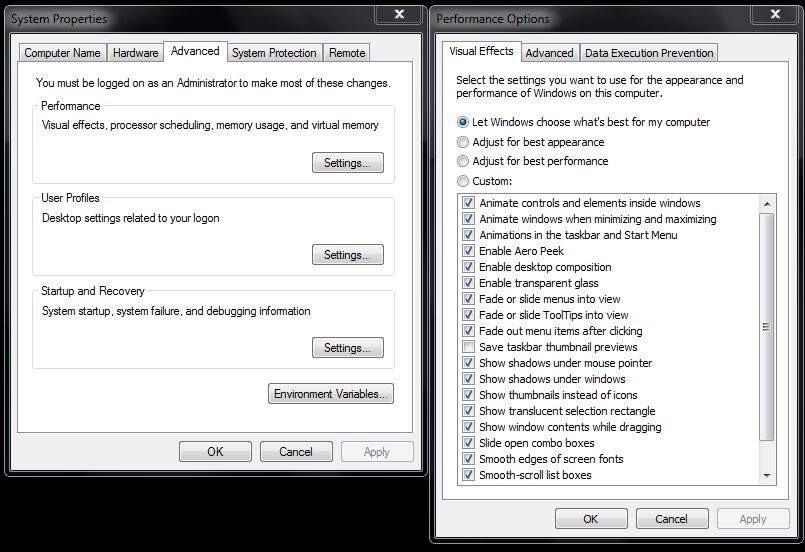
You need to get to the Advanced System Settings, found in the System Properties of your OS. One way to get there is to click on the Start logo ->right click on the word Computer ->go to Properties. 

Under Properties, on the left hand side of the window, click on Advanced System Settings. This opens up System Properties, on the Advanced tab. On this tab, click on Settings under the area called Performance.

The window on the right is what opens when you click 'settings' on the window on the left.

The window on the right is what opens when you click ‘settings’ on the window on the left.

As you can see, the default is to allow Windows to choose what’s best for the computer. However, you can change that to either “Adjust for Best Appearance” or “Adjust for Best Performance.” If you chose “Adjust for Best Performance,” all of the check marks will go away (under Custom, which is another option, as you can turn individual animations on or off), and you will be left with an OS that does not run any animations. It will thus be a bit faster, albeit a bit uglier.

The difference in speed that you are likely to see is very minimal — this is just one small step to making the machine run faster. However, instead of animating the opening of windows, etc., they now snap right open. Even the appearance of this is likely to make you, or your client feel as if the machine is running faster. Sometimes even just small differences are what counts.

Tech Tips for Techs: The Cipher Command

Standard


For many technicians, reusing a computer is part of the job. We have taken many computers, formatted the hard drives, re-installed OSes, and re-purposed the machines for other uses.

Did you know that when you reformat a hard drive through the standard Windows methods (i.e. deleting the partition during your Windows 7/Windows 8 install), you actually leave behind traces of your old OS? Reformatting a drive does not get rid of all of the data. In order to do that, you want to overwrite any existing data present with 0s (technical term referring to binary code).

How is this possible? Windows actually has a pretty cool built-in tool for handling this, called cipher.exe.

cipher

Cipher was built to encrypt and decrypt files and folders, but it can be used to overwrite data as well. Simply put, in order to securely overwrite your partition with 0s, open a CMD prompt and type: cipher /w:{drive letter}:

You can actually overwrite individual folders as well, just by adding the folder name onto the cipher CMD, like this: cipher /w:{drive letter}:\{folder name}

You can also encrypt files by using the CMD: cipher /e (files and folders that are later added to this option will also be encrypted)

And, of course, you can decrypt files by using the CMD: cipher /d (same as above, any files and folders added later are decrypted by default)

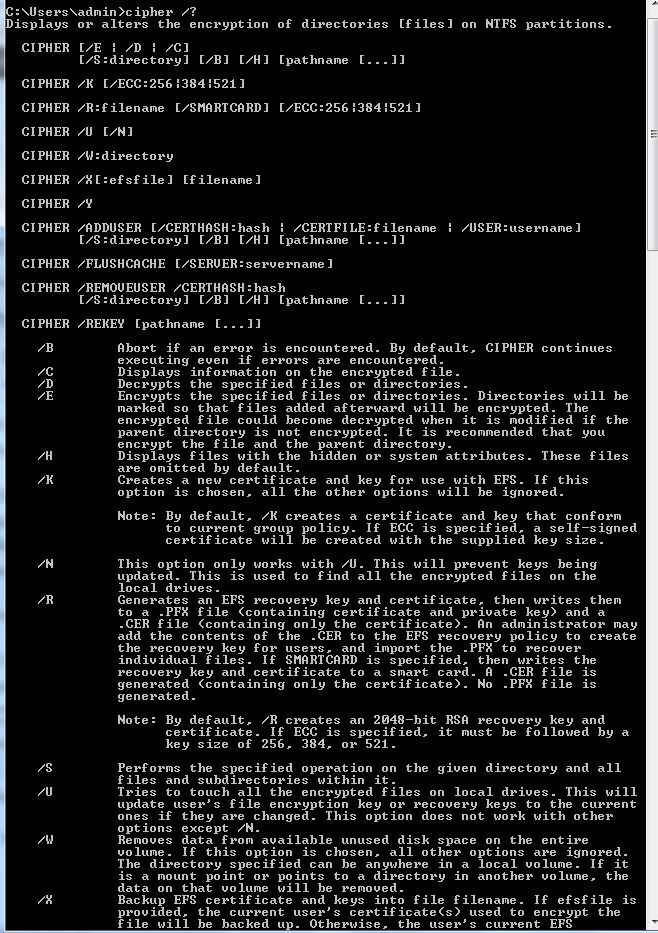
For a complete list of commands, type cipher /?

As with anything, really, this tool will make it a lot harder to recover any data that might have been on the hard drive. However, it is never a guarantee. Virtually anything can be recovered on a hard drive. Forensic companies use write-blocking devices approved by the Department of Defense, but that equipment is very expensive, and usually only in the hands of the good guys. Cipher.exe will protect you against most low-level bad guys looking to recover potentially harmful data off of your hard drive.

Tech Tips for Techs: Microsoft utility for resolving Exchange calendar issues

Standard


In this tech tip, I want to talk about one of Microsoft’s automated tools that you can use to help check for and {sometimes} to resolve issues with Exchange-based calendars. This applies to both on-premise Exchange as well as to Office 365. The utility is called CalCheck, and it was most recently updated back in July of 2014.

Available for download directly from Microsoft [HERE]; it will install and run on everything from Windows XP SP3 all the way through Windows 8.1. There are several ways and options with which to run the tool, but for the purposes of the article I’m only going to cover two of them.

The first, “read only,” will process whatever mailbox you point it at, outputting the log and error files to the directory in which CalCheck is running from.

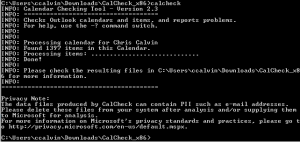
1. Open a command prompt in the CalCheck directory. In my case, this is in my Downloads\CalCheck_x86 folder. Type calcheck and press Enter. It will prompt you for the profile that you want to check. (It’s important to note that you will need an Outlook profile on your machine for the mailbox you want to check, unless you know the LegacyExchangeDN for that mailbox.) Choose the profile, and click OK. The program will proceed to check the calendar, and will notify you in the command prompt when it’s finished.

15-0119_calcheck_clean

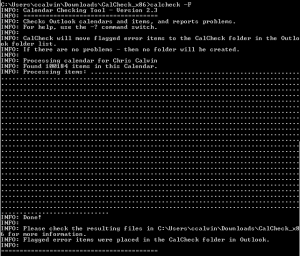
2. Same as the first (except we’ll be adding a flag), type calcheck -F into the command prompt. You will be asked again for which profile you want and the program will proceed as it did in “read only” mode. The notable exception is that for any problematic items it finds, it will create a folder in the Inbox called CalCheck and move them into that folder. See the screenshot below for a calendar I ran this on that should have only had about 1,400 items total… CalCheck found over 100,000! It took close to 3 hours to process and clean out the entire calendar!

15-0119_calcheck_clean

The README file in the CalCheck download will provide much better detail on the other options available to you when running this utility, but this post should give you a good starting point if you find yourself dealing with a problematic calendar where you’re unable to pin down a specific issue.


Tech Tips for Techs: God Mode

Standard


Lately, I have been writing about little-known tips that technicians can use to assist in working on their customers’ machines. Another tip that is not well known, but is VERY cool and helpful, is God Mode.

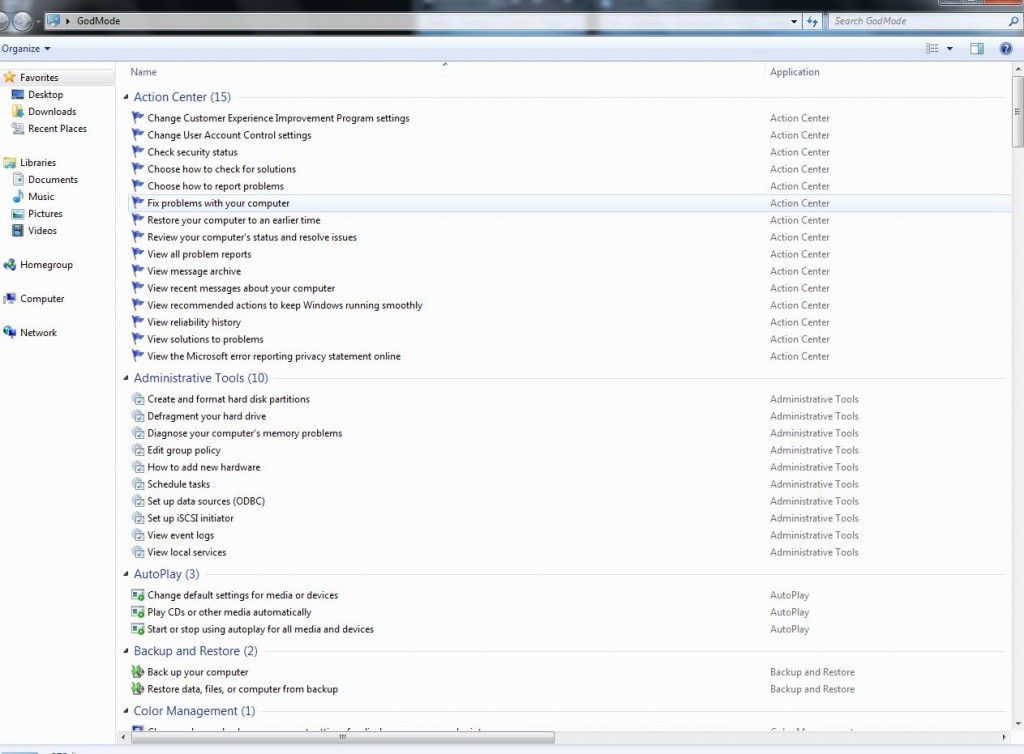
God Mode was introduced in Windows 7, and Microsoft has carried it over to Windows 8. It is simple to do and allows you access to so many areas of the operating system — all in one location. For clients who might have a slow PC or possible virus issues, this is a great tool because it gives you access to 270 control panel functions, some of them not easily found.

Here are the steps to enable God Mode on your Windows 7, or Windows 8 PC:

  • Step #1: Create a folder on your desktop.
  • Step #2: Rename that folder this exactly: “GodMode.{ED7BA470-8E54-465E-825C-99712043E01C}” (minus the quotations).

Your folder will change to look like the Control Panel icon…

GodMode… and inside that folder, you will have a wealth of tools at your fingertips!

GodMode2This is a great tool for any technician, as it puts everything into one convenient location. You don’t have to spend time searching the OS for the right tool. They are all right here now!